Learn more about Rhenium Alloys
Request Quote
Careers – Download Application
TF: 888-RHENIUM PH: 440-365-7388 FX: 888-366-9830
Quality Assurance
Inspection Equipment
Rhenium Alloy’s Quality System
will ensure that you receive your product manufactured to your
exact specifications.
Whitepapers and Abstracts
Resources and Downloads
Rhenium Alloys, Inc. consistently researches and develops new applications for its refractory metal products.
Contact Rhenium Alloys
Request Quote
Careers – Download Application
TF: 888-RHENIUM PH: 440-365-7388 FX: 888-366-9830
Industrial Services
Rhenium Alloys has the expertise and equipment to handle many industrial metal services.
Products & Materials
Testing & Engineering Services
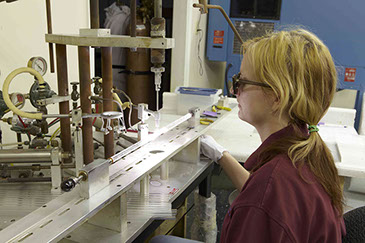 Rhenium Alloys Inc., a leading manufacturer of refractory metals with heat treating and sintering capabilities for other hybrid high temperatures materials.
We have a highly trained technical and experienced staff along with a state of the art manufacturing facility and research lab in North Ridgeville, Ohio (close to Cleveland).
If you have a project that requires high temperature heat treating and the data to support it, Rhenium Alloys is the solution to your high temperature heat treating needs.
Product Datasheet
Downloads
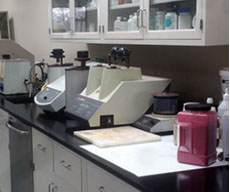 Laboratory Capabilities
Rhenium Alloys Laboratory
Our laboratory is staffed with experts working with some of the finest equipment available. Staff members generally receive factory training from the original equipment manufacturer to ensure that the results that we provide you will be accurate. Every piece of measuring equipment in use is calibrated and continuously maintained to ensure accuracy.
Metallography
While we offer the basic cutting, mounting, grinding, and polishing, what sets us apart is the variety of materials that we can prepare on site using our large assortment of equipment. For your sectioning needs: We have a 10” water cooled Struers Labotom-3 for sectioning your larger samples or a 6” water cooled Mark V Laboratories precision saw for the smaller or more delicate samples. We have the ability to produce 1.25” hot mount (thermo setting plastic resin-AKA Bakelite), quick set acrylic, or epoxy mounts. We can even offer to have your epoxy samples cured in up to 1200 PSI of nitrogen for the ultimate impregnation and edge retention. In addition to the standard grinding and polishing, we also have a Buehler Vibromet accompanied by a good selection of consumables to complete practically any sample that requires vibrotory polishing. If your material requires electrolytic polishing, we also have a
Struers LectoPol-5.
Digital Imaging / Microscopy Stereo
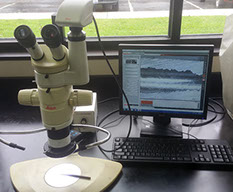 Microscope equipped with a 5MP color camera and a variety of objective lenses able to achieve magnifications from 4x to 160x. Equipped with LED ring light or dual gooseneck halogen for the proper illumination regardless of specimen size, reflectivity, or geometry. The software used to analyze the image is capable of basic shape measurements and calculating grain size. Generation of a customized report to fit your application is also available.
Stereo-Microscope equipped with a 5MP color camera and a variety of objective lenses able to achieve magnifications from ranging 25x to 1000x. This microscope has a variety of contrast methods available including Brightfield, Darkfield, Cross-Polarization, and Numarski Differential Interference Contrast (DIC). The software used to analyze the image is capable of
basic shape measurements and calculating grain size. Generation of a customized report to
fit your application is also available.
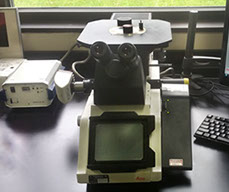 Stereo-Microscope (Inverted Metallograph) equipped with an 8MP color camera and a variety
of objective lenses able to achieve magnifications from ranging 25x to 1000x. This microscope has a variety of contrast methods available including Brightfield, Darkfield, and Numarski Differential Interference Contrast (DIC). An optional Mercury light source will provide plenty of illumination. The software used to analyze the image is capable of basic shape measurements and calculating grain size. Generation of a customized report to fit your application is also available.
Microhardness Testing
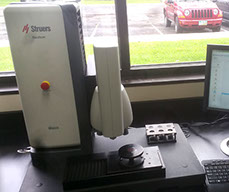 Rhenium Alloys uses a Struers DuraScan 50 micro-macro hardness tester. Using an automated programmable stage and a wide range of optics, this hardness tester is capable of reliably delivering load ranges from 10g to 10 kg using a unique combination of dead weights and load cell technology. With a maximum Z height over 10” and a large load range, this hardness tester can evaluate even un-polished surfaces. The software driven machine is capable of converting the data from the Vickers hardness to any other method that ASTM or DIN converts to (HRA, HRB, HRC, Superficial Rockwell, Brinell ect.) The software adjusts the lighting, focuses, and reads each indent automatically, leaving little to no room for “carbon based error”. Generation of a customized report to fit your application is also available.
 Particle Size Analysis
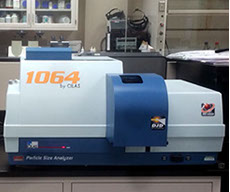
For analyzing particle size of powder or other fine solids, we have a Cilias 1064 Particle Size Analyzer. The CILAS 1064 integrates 2 sequenced laser sources positioned at 0° and 45°, to produce a diffraction pattern analyzed on a 64 channel silicon detector. Through the software, the distribution curve is represented by 100 classes over the range from 0.04 to 500 μm. We have the ability to use wet dispersion using de-ionized water or dry dispersion. Both dispersion methods can utilize ultrasonic to break up agglomerated particles. Generation of a customized report to fit your application is also available.
Powder Blending and Milling
With four various sizes of “V” blenders available for R&D work, we will almost certainly have the right size to suit
your needs. Do you need your powder mechanically alloyed? We can do that too. We have a planetary ball mill that
will use your choice of Tungsten Carbide balls in a Tungsten Carbide vessel or Stainless Steel balls in a Stainless
Steel vessel. The planetary mill has a maximum of 450 RPM.
 SEM / VP-SEM / BSE / EDS / XRF
SEM (Scanning Electron Microscope)
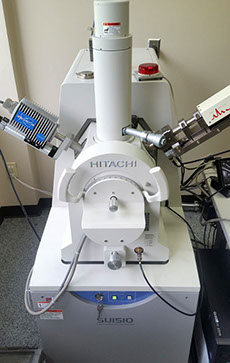
Our laboratory is home to a Hitachi SU-1510 Variable Pressure Scanning Electron Microscope outfitted with EDS and XRF. The SEM is capable of magnifications from 15x to 200,000x with an excellent depth of field and superior resolution images in both BSE and SE. This unit is variable pressure and we have the option to sputter coat with either Au or Pd. The Bruker X-Flash 5010 Silicon Drift EDS detector is able to detect everything from Be (4) to Am (95) with a maximum pulse load 750,000 cps. Optimized electron trap for interference-free analysis in the low energy range and Peltier cooling. Our IXRF Systems X-Ray Florescence Fx Tube will provide quantifiable results (when using a known standard) down to the PPM range to analyze materials from Be (4) to U (92). With a maximum of 35 kVe, even the smallest energy line peaks can be found. The available spot sizes for this technique are 200µm, 500µm, and 1000µm. Generation of a customized report to fit your application is also available.
EDS
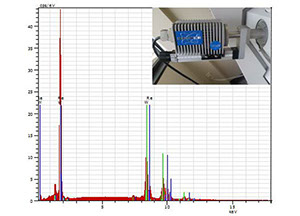 Our Bruker X-Flash 5010 Silicon Drift EDS detector is able to detect everything from Be (4) to Am (95) with a maximum pulse load 750,000 cps. Optimized electron trap for interference-free analysis in the low energy range and Peltier cooling (no liquid nitrogen or other cooling agents required). Generation of a customized report to fit your application is also available.
XRF (X-Ray Florescence)
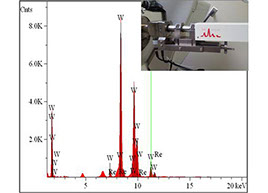 Our IXRF Systems X-Ray Florescence Fx Tube will provide quantifiable results (when using a known standard) down to the PPM range to analyze materials from Be (4) to U (92). With a maximum of 35 kVe, even the smallest energy line peaks can be found. The available spot sizes for this technique are 200µm, 500µm, and 1000µm. Generation of a customized report to fit your application is also available.
 Mechanical Testing
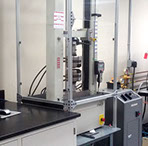
The MTS Q-Test/25 uses an electro-mechanical frame to achieve a load range from under
6 lbf (25 N) up to 5600 lbf (25kn) in either tension or compression. The fame can safely and accurately travel from 0.005”/min to over 10”/min. We have plenty of grips and fixtures to hold just about any specimen, including a hydraulic wedge grip to greatly reduce slippage. Additional grips and fixtures can be made for your specific application, at your request.
High Temperature Furnaces
Spectra-Mat Furnace
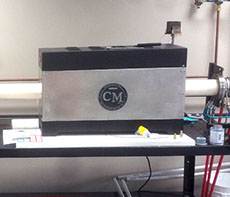 At the temperatures that Rhenium Alloys generally operates, we take our furnaces seriously. Our Spectra-Mat has a hot zone of 3.5” in diameter x 14.5”. We have the ability to reach above 2000°C in a hydrogen atmosphere. We measure the temperatures using optical pyrometers connected to data recorders to record the soak.
Laboratory CM Furnace
Our smaller laboratory tube furnace is capable of going from room temperature up to 1700°C in Hydrogen, Nitrogen with other possible cover gasses available upon request. This furnace has a hot zone that is 3” in diameter and 24” long. The ramp rates are 200°C per hour from room temperature to 800°C, then 100°C increments until the desired temperature is met.
List of Furnaces and Temperature Ranges:
Notes
—
Full Cold Zone
No Cold Zone
Single End
Double End
Sintering Bell
Fully Programmable
Any Gas Available
Furnace Type
Tube
Tube
Box
Box
Box
Bell
Chamber
Vacuum
Temp Range °C
1100 – 1500
1000 – 1100
1100 – 1600
1100 – 1600
1100 – 1600
0 – 2200
0 – 2200
0 – 1700
Wide
2"
3.5"
6"
19"
8"
4"
8.5"
3"
Length
11"
150"
24"
60"
60"
4"
8.5"
6"
Cover Gas
Hydrogen
—
Hydrogen
Hydrogen
Hydrogen
Hydrogen
Hydrogen
—
Website by: Unity Design, Inc. Icon Fonts: Font Awesome
PH: 440-365-7388
FX: 888-366-9830
TF: 888-743-6486
(888-RHENIUM)